Welcome to Easter Egg #1
The See Weeds Blog
This is an account of my discoveries while making the film See Weeds.
I was pretty "green" when I started this adventure, I hope you will be inspired by the enthusiasm and learn from my adventures.
--- January 19, 2016 ---
 Just received word that I am the successful recipient of the Atlantic Filmmakers Cooperative’s (AFCOOP) Celluloid Creation Grant to make my next project See Weeds!
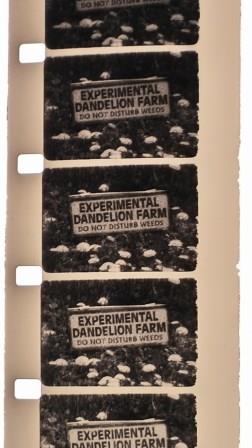
“See Weeds” is a five minute examination of three weeds and each weed’s direct effects on film stock via hand-processing. The film aims to not only reveal the visual characteristic of plants but also of filmic qualities that each plant will impart on the film stock. I plan to film three plants easily accessible in Nova Scotia - Colt’s Foot, Dandelion, and Goldenrod. I will use nine rolls of tri-x black and white Super-8 film (three per plant) and then develop the film in each plants own essence (boiled down greens and flowers) . A special thank you to Heather Harkins and Dagie Brundert, my inspiration for all of this!
I love film. I love the look, the texture, the quality, and especially the tactility. What I don’t really like is the environmental impact. One could, argue at nausea, the environmental impacts of digital vs analogue in image creation but chemically it just feels wrong; it also smells wrong this liquidy goo to develop film, not to mention the film has to travel by plane to Toronto (and back) to get a developed image. Did I mention that it is also expensive? Welcome to the blog of my experiments to find a more environmentally friendly developer and perhaps more affordable way to process film. At the very least it will be a fun experiment, at the best I’ll make a groundbreaking film
Just received word that I am the successful recipient of the Atlantic Filmmakers Cooperative’s (AFCOOP) Celluloid Creation Grant to make my next project See Weeds!
“See Weeds” is a five minute examination of three weeds and each weed’s direct effects on film stock via hand-processing. The film aims to not only reveal the visual characteristic of plants but also of filmic qualities that each plant will impart on the film stock. I plan to film three plants easily accessible in Nova Scotia - Colt’s Foot, Dandelion, and Goldenrod. I will use nine rolls of tri-x black and white Super-8 film (three per plant) and then develop the film in each plants own essence (boiled down greens and flowers) . A special thank you to Heather Harkins and Dagie Brundert, my inspiration for all of this!
I love film. I love the look, the texture, the quality, and especially the tactility. What I don’t really like is the environmental impact. One could, argue at nausea, the environmental impacts of digital vs analogue in image creation but chemically it just feels wrong; it also smells wrong this liquidy goo to develop film, not to mention the film has to travel by plane to Toronto (and back) to get a developed image. Did I mention that it is also expensive? Welcome to the blog of my experiments to find a more environmentally friendly developer and perhaps more affordable way to process film. At the very least it will be a fun experiment, at the best I’ll make a groundbreaking film
--- January 25, 2016 ---
Met with Herb, my mentor for the project. He is very enthusiastic about this project and very supportive. We talked a lot about process and safety. "Eco" and "organic" does not necessarily mean "safe" - think about how a hot pepper or an onion can really effect you physically. A well ventilated area (or N95 respirator mask) is essential, also eye protection, gloves, and a smock would also help.
He also suggested that before I begin experimenting with plants, that I start filming with super 8mm and do some hand/bucket processing with Caffenol. Caffenol is made up of instant coffee, vitamin C, washing soda, salt and water. He says that I can develop film this way but will most likely need a conventional fixer to make the image last; without the fixer the image would quickly fade. These are all great ideas as it will give me a base to work from. Colt's foot doesn't appear until April/May so this will give me some time to figure things out.
Herb also clued me into a lot of cool blogs and websites to check out and begin doing some research.
Here are some of them:
--- February 2, 2016 ---
--- Supplies List ---
Chemical resistant gloves - not just dishwashing golves
Safety Glasses
Smock
N95 Respirator
Funnels
Stir sticks or sltted spoon
Four litre measuring cup
Tarp or junky towels
Kitchen Scale
Thermometer
Vitamin C
Crappy instant coffee (is ther any other kind)
Wahsing Soda
Buckets (at least 5 with different sizes)
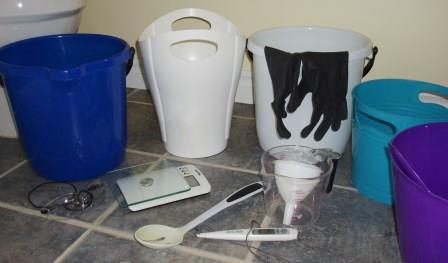
All of this cost me about $80. Some of it was purchased at the dollar store. The most expensive item was the thermometer. A few items I had around my house like the respirator, smock and junky towels.
Once these items are used for film developing they are ONLY EVER used for film developing. No cross contamination of household items and film supplies please.
The below is courtesy of Afcoop:
Fixer
Hypo Clear - used to cut down on washing time
Photo Flo - used to help with water spots on the film
9 rolls of tri-x black & white Super 8mm film
--- February 4, 2016 ---
--- Washing Soda Test ---
Today I am testing my washing soda. If it is truly washing soda it will only lose a few grams of weight when baked and I need washing soda.
Method:
Bake 50g of washing soda in a pre-heated 120°C or 250°F oven for 25 minutes.
Results:
End measure was 47g
Success, I have washing soda!!
Note: If the washing soda were to lose half the volume this would mean I would not have washing soda.
--- February 11, 2016 ---
 I did it! I did it! I developed my first role of Super 8 black and white film!
I found a great multi-timer app from LemonClip that speaks in a computer voice and vibrates. It says things like:
“WASH ONE COMPLETE BEGIN FIXER, WASH ONE COMPLETE BEGIN FIXER!”
A very good tool. I have heard that some people use music to time their film, but I like this multi-timer.
I decided to develop the film in the bathroom for a few reasons:
1. It has running water.
2. It’s an easy room to black out (sort of - see notes below)
3. It’s well ventilated this is important - even though I was using caffenol the fixer is still pretty toxic.
Because I have to start the timer first and then do everything in complete darkness, I gave myself 10 minutes to "break" open the film and divide it up. Ample time, though braking open a Super 8 cartridge with a hammer in dark is slightly scary. The final wash is for 10 minutes but running water which seems a bit wasteful, so I decided to rinse it under running water for a couple of minutes then soak for a couple of minutes, repeating a few times and ending with a rinse under running water. I was a little harsh in my agitation of the film, next time I need to be more gentle, I can see a lot of scratches and large pieces of film have chipped off.
My biggest obstacle was darkening the bathroom. I read instructions about blacking out rooms and then sitting in the blacked out room for five minutes, waiting for your eyes to adjust to the darkness. If after five minutes you can't see your hand in front of your face then the room is dark enough. I thought I had it blacked it out completely but I DID NOT! After a few more minutes I could see the buckets, the toilet, the sink. Luckily, I thought on my feet and quickly sunk the film into the bucket and covered it with one of the towels I was using underneath the buckets (in case of drip-age). This quick submerging of the film meant that I could not divide the film up as evenly as wanted to but that is okay. I also put the film in the developer earlier so I think I may have developed for 16-17 minutes rather than the original 15 minutes.
Cafenol Recipe:
1 Litre Water
54 g Washing Soda
16 g Vitamin C
40 g Instant coffee
In that order.
Sometimes salt is in this recipe but I forgot it. It is suppose to help your film from fogging.
Caffenol Test #1
Method
| Step | Time | Temperature |
|---|---|---|
| Caffenol | 17 min. | 21°C |
| Water/Stop | 3 min. | 20°C |
| Fixer | 6 min. | 19°C |
| Water/Stop | 3 min. | 20°C |
| Lights On | ||
| Hypo-Clear | 3 min. | 19°C |
| Water/Rinse | 10 min. | 20°C |
| Photo-Flow | 1 min. | 19°C |
The film looks:
Amazing. A Nice sharp contrast
Lessons:
Need to black out the room better.
Remember to add salt.
--- March 22, 2016 ---
--- Kale and Grass Test ---
Grrr… Shot some really cool stuff in the snow but my Sankyo Super 8 Camera does not like the cold and the cartridge froze up and I could not get it unjammed. I ended up losing about ¾ of a role. I did manage to get a little bit of film shot from this role and developed and I saved a tiny bit from the last role I shot. Still it is a bummer, because snow looks great as a negative.
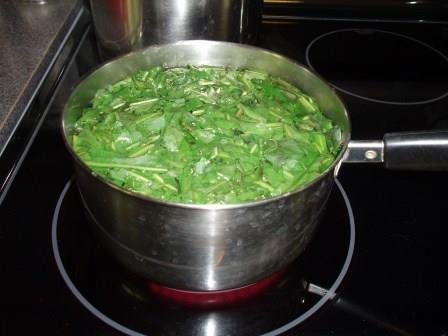
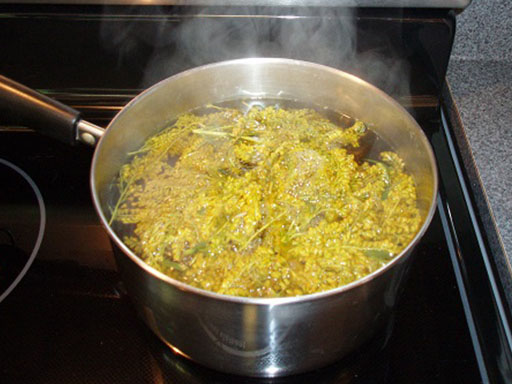
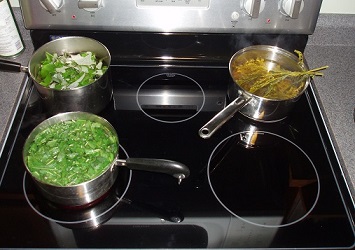
For this test I used a grass and kale mix. I began by cutting up and boiling down grass in water and then straining the grass and weeds. The water did not look green enough to me so I thought kale would be fun because I know it turns water super green!
Recipe:
1 Litre Water (with boiled down grass and kale)
20 g Vitamin C
100 g Washing Soda
18 minutes at 30°C
Grass and Kale Test #1
Method:
| Step | Time | Temperature |
|---|---|---|
| Grass Kale | 18 min. | 30°C |
| Water/Stop | 3 min. | 20°C |
| Fixer | 6 min. | 19°C |
| Water/Stop | 3 min. | 20°C |
| Lights On | ||
| Hypo-Clear | 3 min. | 19°C |
| Water/Rinse | 10 min. | 20°C |
| Photo-Flow | 1 min. | 19°C |
The film:
 Has a greenish hue (kind of cool). A little greenish, is good. But the texture is very dark, not a lot of contrast. I think next time I will try processing it for LESS time perhaps 15 or 14 minutes. It does not look as good as the caffenol.
Lessons:
Forgot to add salt again.
Kale is NOT the best choice to mix with grass. I found out that kale has extra special qualities that react in very special ways with the film rather than most organic material. There are so many variables in these experiments - time, agitation, amount of weeds in the water, evaporation of water from the boiling down of weeds, even the time of year a plant is harvested can effect the results. I will try very hard going further to modify only one variable and keep things consistent, this is going to be a challenge. I also need to find out more "chemically" what is going on. What exactly is the science behind this process anyway?
Boil the ingredients before you set up the dark room, then as you are setting up the dark room let the mixture cool. Cooling down the mixture to the right temperature was a bit tricky this time and I was impatient. I did wait until it got to 33°C and then blocked off the rest of the dark room and did the final prep before it cooled down to 30 °C.
Room is blacked out more but light still comes in. I still freak out in the dark and need to take more time before beginning the developing process to just get comfortable in the dark.
--- April 11, 2016 ---
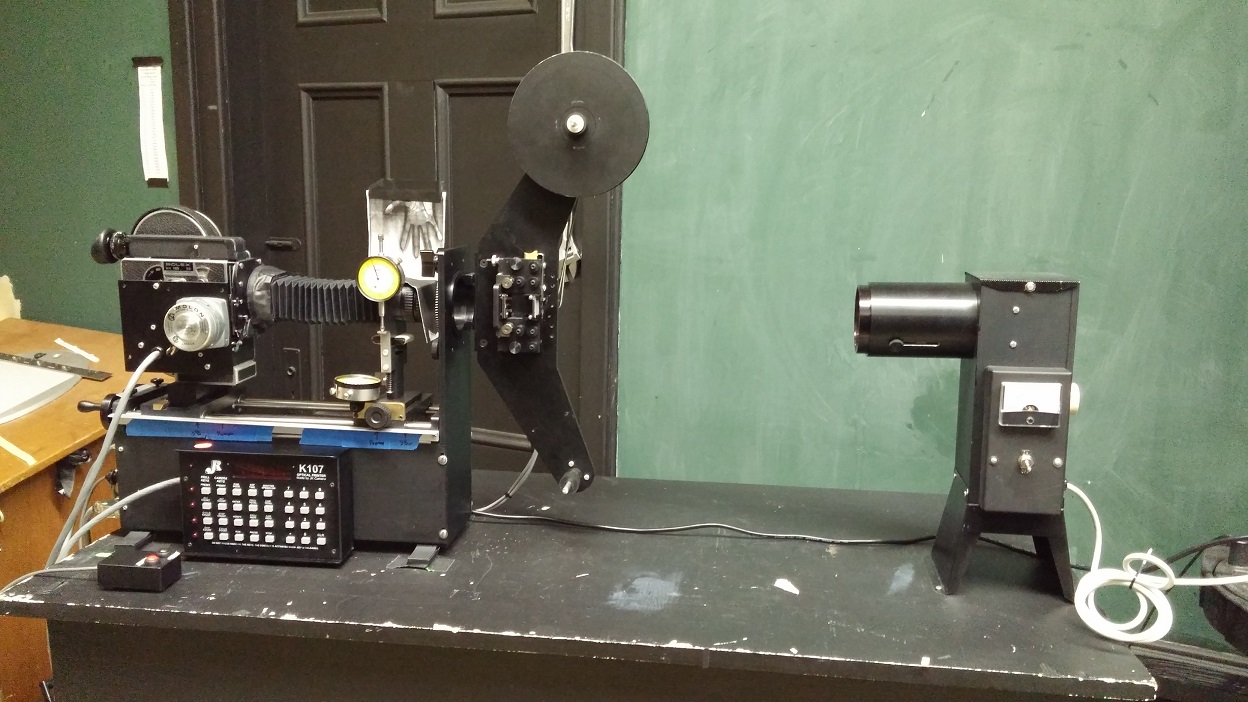
--- Plans Change and the JK Optical Printer ---
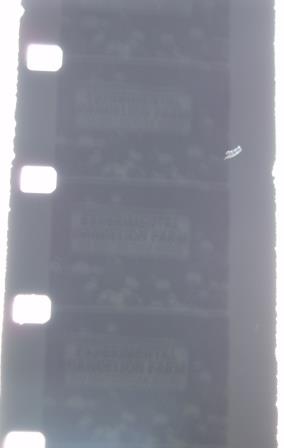
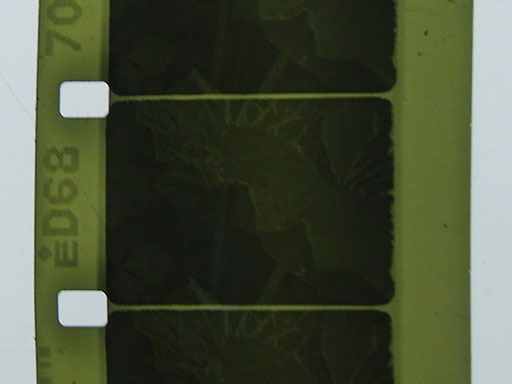
So, let’s talk a little bit more about what is going on here. Developing black and white tri-x reversal film only using a developer gives you a negative image. This means your blacks are white and your whites are black. If you are developing an image of an ant, a negative image means the ant will be white (not black).

There are a few ways to correct this and get a positive image:
1. Scan the film and then reverse it digitally (this is what I intended in my proposal, but now as I am getting into the process this seems like it does not capture the spirit of the project)
2. Try an eco-reversal process. (very excited about this possibility but I am going to try refining processing with weeds first)
3. Take the Super 8mm film and optically print it to 16mm and then develop the 16mm to get a positive image.
 After much deliberation, consultation, and reading I have decided to change the way this project is going to be conducted. Because of the variables in weed quality and the availability of weeds, I have decided to process the Super 8 footage with caffenol first and then transfer the negative footage to 16mm via the JK Optical Printer. I will process the 16mm in the weed-ol (my pet name for the weed mixture) to get the positive, hopefully the characteristics of the weed or its "essence" will still be conveyed on the 16mm film.
This project is already presenting some challenges as the weeds are only around for a finite period of time (hense my developer is only around for a finite period of time). Developing in this way I can at least ensure that I get the negative image filmed, as caffenol is predictable.
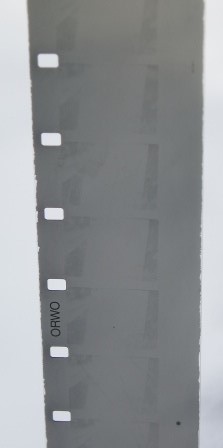
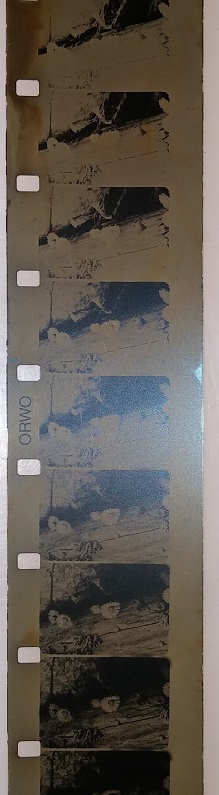
I also only have a finite amount of funding for this project, so I have decided to still use nine rolls of film but six will be black and white Super-8 tri-x and the other three will be 16mm ORWO black and white stock.
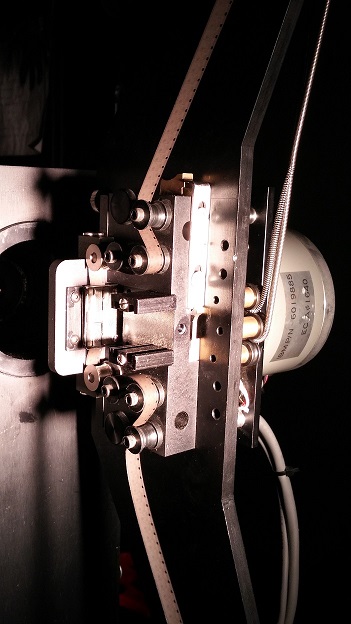
Because I am transferring Super 8mm to 16mm I need to learn how to use the JK Optical Printer. Today Herb provided me instruction on this fun piece of machinery. The optical printer has many cool features that I can see will lend itself to some exciting possibilities but for right now I will be using it just to transfer Super 8mm to 16mm.
 I have also discovered more about the chemistry of the this whole process.
Phenols are the basis of development part of the process, phenols are found in pretty much every plant, some plants have more, but all plants have them (coffee comes from plants therefore it has phonols and a lot of them). When you chop up a plant and boil it down phenols are released which assist in the development process.
Vitamin C helps with the contrast and is a hyper-additive to the phenols. I have been using a bottle of Vitamin C Powder from the health food store.
Washing Soda makes the solution alkaline which is important for activating the developing agents.
Notes on Potassium bromide or salt - So, I am not using either of these, I heard you can use it to eliminate the "fog" on your film but I haven't found it to be a problem yet and therefore I am not using it.
--- April 12, 2016 ---
 I processed my first test from the Optical Printer in Caffenol at 22°C. I only developed, washed, fixed, and then did the final rinse. No need for the other steps as this is just a test. The washes were a little on the warm side.
Process:
Standard Caffenol Recipe
15 minutes at 22°C
The film looks:
The film was washed-out, thin, and light.
Very low contrast.
But WHY?
Lessons:
The results mean it was underdeveloped but was it because it wasn't agitated enough or because of the exposure?
Recording the F-stop on the camera on the Optical Printer would have been handy bit of information to have for this test, wouldn't it?
--- April 14, 2016 ---
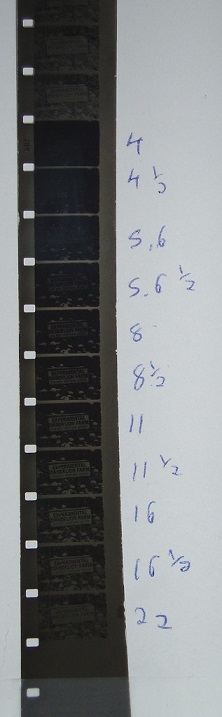
--- Bracket Tests ---
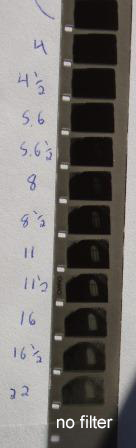
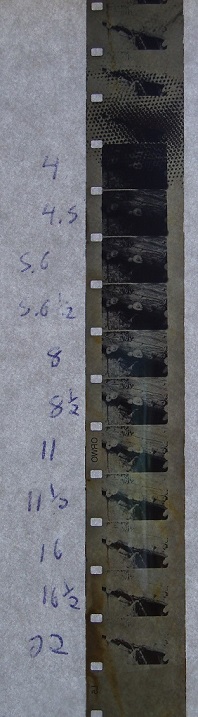
Ah the Bracket Test!! Bracket Tests are conducted when using the Optical Printer. Essentially you are exposing one frame of film at various increasing F-stops to determine the best F-stop for transferring your film.
After you have developed your bracket test, the results will help you to determine at which F-stop you should expose your entire roll of film at. Some people do bracket stops for every shot that changes light (this is a little overkill for my purposes).
A slight problem with this method when hand-processing is having so many variables; also weed-ol is not exceptionally stable, there will always be some slight inconsistencies.
The "filter" is a piece of fogged glass placed between the film and the light source on the optical printer.
F16 seems to be a good F-stop for caffenol with no filter (I have also heard the filter called a diffuser)
Very low contrast.
Special Tips when using the Optical Printer:
** It is a good idea to keep the eye piece closed on the camera when conducting tests.
** It is also a good idea to annotate on your film at the beginning of your bracket test. I usually make a pattern at the beginning of the bracket test so I can tell what end is F4 and what is F22. If you don't make some kind of distinguishing pattern you might get confused as to whether you are at F4 or F22.

--- May 18, 2016 ---
I love bucket processing!! It is so fun and easy now. Because it has been difficult to eliminate all of the light that enters my bathroom/darkroom. I have decide to do bucket processing at night, this way the bathroom is pitch black. I began tonight at 8:30 PM and finished about 1:00 AM. Very fast (I think) for getting the whole room set up, processing TWO batches and then tearing everything down again. The room is super dark this way. I like it much better but I am a little more tired and grouchy the next day from staying up so late.
I shot two roles one of colt's foot and one of dandelions and processed them both in caffenol. I made a new batch of caffenol for each roll of film.
Bucket processing is empowering. I feel confident in the caffenol recipe. The results are consistent.

Because you are in the dark, having different shapes of buckets will help you know where you are at in your process, You will need at least four buckets, one for each process developer, stop/wash, fix, and final rinse.
Up until now I had been measuring ingredients by placing them directly on the scale, this was not optimal because sometime ingredients would spill off of the scale. It is much easier to measure the weight of the empty cup and then put the ingredients in the empty cup and subtract the weight of the cup.
--- May 19, 2016 ---
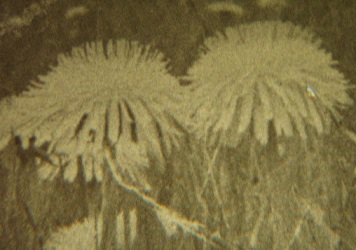
Thank goodness the lawn mower is broken, my lawn is filled with beautiful dandelion seed heads! I The Canon 1014 is having some problems so I used Afcoop's Nikon R10, a nice little camera. I am looking forward to seeing the results.
--- May 25, 2016 ---
 Epic fail in the animation room.
The optical printer has two cartridges a Super 8mm cartridge and a 16mm cartridge. I could not for the life of me attach the Super 8mm cartridge today. I could take off the 16mm cartridge just fine but because I did not have my glasses or good lighting I could not hook it up.
Very annoying. I spent a whole hour just fiddling with it.
There are these screwdriver type slots that need to line up correctly so that the cartridge is flush and the mechanics can work properly. I could not get the 8mm cartridge flush.
Very frustrating. I also ripped a few sprockets on my film in the optical printer. grrr...
Breathe.
--- May 27, 2016 ---
Well after consulting with Herb and Alex, researching and bringing the proper tools (my glasses and a headlamp). I got everything to line up and was able to use the optical printer. I love it when things work out.
Transfered a few strips of some of the dandelion footage at F16 for weed-ol tests.
--- June 2, 2016 ---
--- Weed-ol with Dandelions Test 1 ---
And so now it begins the refinement of the Weed-ol.
I need to start somewhere, therefore I am basing the Dandelion Weed-ol recipe on Dagie's Magnolia recipe.
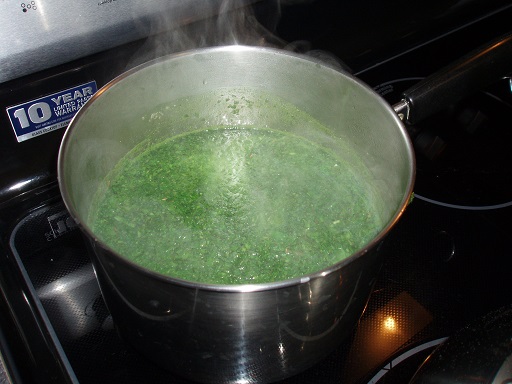
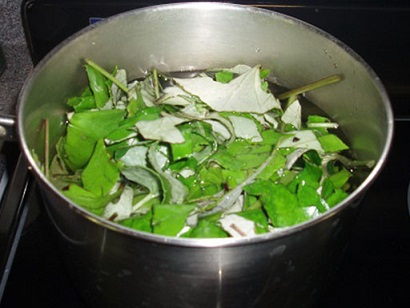
Method for Dandelion Juice
Take one Litre of water
Some dandelion leaves (chop up coarsely with a knife)
Boil leaves in water for 45 minutes
Drain out leaves
Cool down to 30°C
Recipe:
1 Litre of Dandelion Juice
20 g Vitamin C
100 g Washing Soda
25 minutes at 30°C
Dandelion Test #1
Method
| Step | Time | Temperature |
|---|---|---|
| Weed-ol | 25 min. | 30°C |
| Water/Stop | 3 min. | 20°C |
| Fixer | 6 min. | 19°C |
| Water/Stop | 10 min. | 20°C |
| >Lights On |
Hypo-Clear and Photo-Flow not needed for tests.
The film looks:
Really dark. Not much Contrast
Lessons:
The weed-ol ended up brown, not green like I had hoped. Maybe I need to chop up the dandelions more?
25 minutes is a long time to process film and the temperature will drop in that time period. At the end of the whole process the Weed-ol had dropped to 21°C which I don't think was good.
I think next time I will try hotter for longer.
--- June 27, 2016 ---
--- Weed-ol with Dandelions Test 2 ---
In this test I am trying to achieve two things:
1. More contrast with the developer
Perhaps more phenols need to be released to get a better developer, therefore I have decided to use a food processor to make a "dandelion mush."
2. Greener weed-ol
De-veined the dandelions. The veins are red and brown, perhaps this is what is making the water brown.
Method for Dandelion Juice
Take one Litre of water
Add some dandelion leaves (pulverized with a food processor)
Boil leaves in water for 30 minutes
Drain out leaves
Cool down to 35°C
Recipe:
1 Litre of Dandelion Juice
20 g Vitamin C
100 g Washing Soda
25 minutes at 30°C
Dandelion Test #2
Method
| Step | Time | Temperature |
|---|---|---|
| Weed-ol | 35 min. | 30°C |
| Water/Stop | 3 min. | 20°C |
| Fixer | 6 min. | 19°C |
| Water/Stop | 10 min. | 20°C |
| Lights On |
The film looks:
Even darker than Dandelion Test 1. WHY?

Lessons:
The weed-ol was green at the beginning but then turned brown again, clearly the de-veining of the dandelions did not work.
Because of this I also stopped boiling the water. I only boiled for 30 minutes this time.
Because I was impatient I cooled down the weed-ol in the fridge, then it was too cold, so I had to warm it up on the stove again. Did this compromise the pheonols in the weedol?
I seem to be changing too many variables all at once. I am torn by this because the dandelion season is only so long. Already, I have missed the bloom of the dandelion flowers. I know there will be another bloom in fall but it won't be as grand as the one in spring.
A few people has mentioned I should "infuse" the weed-ol with caffenol. I disagree. I believe this will work, I just need to keep trying.
--- July 3, 2016 ---
--- Weed-ol with Dandelions Test 3 ---
It has occurred to me that maybe I need to be more scientific, so I am going to measure the exact amount of weeds I use and account for evaporation too.
Method for Dandelion Juice
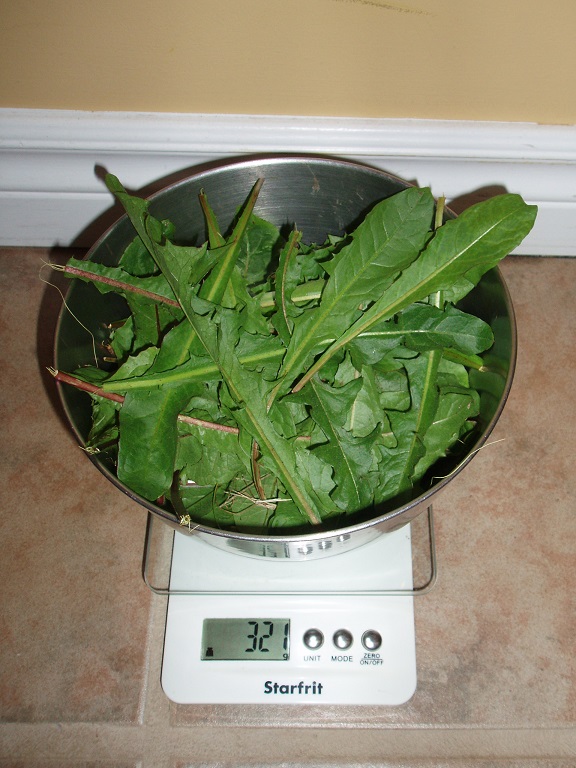
1.5 Litre of water
Add 79g of dandelion leaves (this time I used a pestle and mortar)
** the weight of the container is 242g which is why the scale shows 321g
Bring to a boil and then simmer leaves in water for 2 hours (soaked leaves for another 6 hours as juice cooled. This means leaves were soaked for a total of 8 hours)
Drain out leaves
Cool down to 35°C
Recipe:
1 Litre of Dandelion Juice
20 g Vitamin C
100 g Washing Soda
30 minutes at 35°C
Dandelion Test #3
Method
| Step | Time | Temperature |
|---|---|---|
| Weed-ol | 30 min. | 35°C |
| Water/Stop | 3 min. | 20°C |
| Fixer | 6 min. | 19°C |
| Water/Stop | 10 min. | 20°C |
| Lights On |
The film:
Still dark. No image.
Lessons:
I "feel" like the developing time is too long. Next time I will try 30 degrees at 12 minutes
--- July 4, 2016 ---
--- Weed-ol with Dandelions Test 4 ---
Method for Dandelion Juice
1.5 Litre of water
Coarsely chopped 79g of dandelions
Boiled for 2 hours in 1.5L of water eventually reducing the mixture to 1L
Let steep for 6 hours
Recipe:
1/2 Litre of Dandelion Juice
50 g Washing Soda (used this first before vitamin C)
10 g Vitamin C
12 minutes at 30°C
Dandelion Test #4
Method
| Step | Time | Temperature |
|---|---|---|
| Weed-ol | 12 min. | 30°C |
| Water/Stop | 3 min. | 20°C |
| Fixer | 6 min. | 19°C |
| Water/Stop | 10 min. | 20°C |
| Lights On |
The film:
Success!! Nice contrast, a bit dark.
Lessons:
Next time less temperature and not as much agitation.
--- July 6, 2016 ---
--- Weed-ol with Dandelions Test 5 ---
--- Exothermic Reactions ---
Alex suggested pre-soaking the film to soften up the emulsion and make it more hospitable to the developer. This time I pre-soaked the film in a water bath for one minute, it made a difference. I also did not agitate as frequently and quickly and let the developer do the work.
Method for Dandelion Juice
same as above
Recipe:
1/2 Litre of Dandelion Juice
50 g Washing Soda
10 g Vitamin C
12 minutes at 35°C
Dandelion Test #5
Method
| Step | Time | Temperature |
|---|---|---|
| Pre-wash | 1 min. | 20°C |
| Weed-ol | 12 min. | 25°C |
| Water/Stop | 3 min. | 20°C |
| Fixer | 6 min. | 19°C |
| Water/Stop | 10 min. | 20°C |
The film:
Crisp and clear! Beauty duty!
Perfect, will use F-Stop 8 1/2
Lessons:
Film developing is like baking, if you cook it too long or too hot you are just going to burn everything!
SO THE TRICK...BECAUSE THERE IS A TRICK.
The temperature of the developer warms up! This whole time I have been burning the film!!!
Up until this point I was taking the temperature reading before adding the vitamin C and washing soda. Today I took two readings, one with just the dandelion-tea and then one after the other ingredients were added. The chemical reaction caused the temperature to increased by 4°C!! This is called an exothermic reaction.
So I started at 21°C and the temperature increased to 25°C.
Going forward any temperatures that you read will be after all the ingredients are added to the developer.
--- July 7, 2016 ---
--- Plans Change and the JK Optical Printer ---
Today's Tasks
1. Transfer one of the dandelion rolls on the optical printer at 8 ½ F-stop for dandelions
2. Conduct two bracket tests on the colt’s foot.
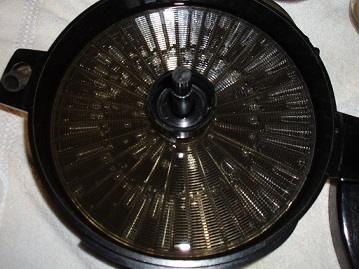
3. Develop the dandelion roll in the lomo tank.
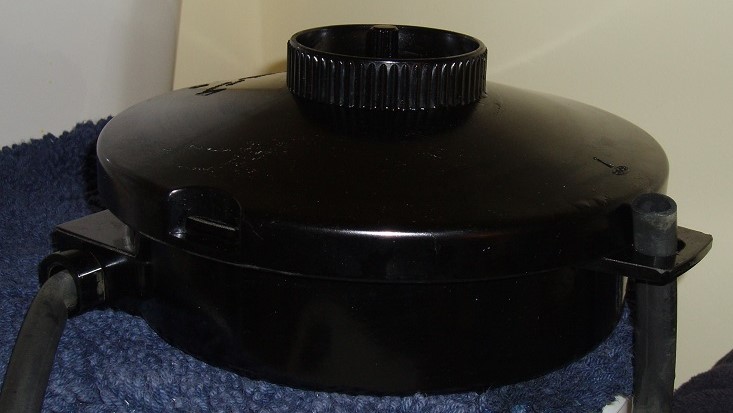
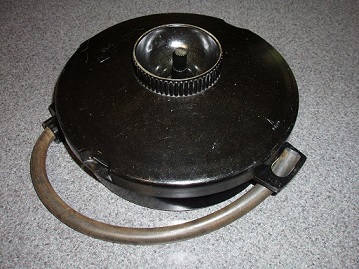
Today I used the Lomo Tank. At first it was very difficult to load but I practiced for a while with my eyes open and then closed and then in the dark. When the time came to load the “real reel" (haha) it worked beautifully. I love the lomo tank, I did get a little messy emptying the tank the first time but I got the hang of it by the end of process. I love this device!
The problem I encountered is that the tank requires a little more than a litre (actually 1.5 litres for for one roll of 16mm film). So the film turned out a bit uneven. I also wrecked my fixer, I think it is best to do a double wash between the developer and fixer.
When I brought the film to Afcoop the film was very jumpy, it turns out the optical printer needed an adjustment. Alex was so super helpful and went right over and made the adjustment, it was tricky but he got it done and then we processed the film!! We went back to Afcoop to watch the film and were happy to discover that he did in fact fix the problem! Woo Hoo Alex!!
So you might notice there is a lot of back and forth, that is because not everything is under one roof. It is a bit of bit of a logistic hassle. In a perfect world Afcoop would have a lab, and editing system all under one roof, but they don't. So I have been traveling between three spaces - my lavlab (bathroom), the optical printer room in one of the university buildings in town, and the editing suite at Afcoop. I guess the positive side is that at least I am not stuck in one room all day?
I have decided to go ahead and redevelop this role because the footage is too jumpy. I think I will do one Super 8 or two roles of 16mm in my next lomo developing session.
--- July 10, 2016 ---
--- Weed-ol from Colt's Foot ---
Today I processing with Colt's Foot. Colt's foot is a very strong plant, but soft leaves. Perhaps a good toilet paper plant?
Method for Colt's Foot Juice
1.5 Litre Water
Coarsely chopped 134g of Colt's Foot Plant
Boiled for 2 hours in 1.5L of water eventually reducing the mixture to 1L
Let steep for 6 hours
Recipe:
1/2 L of Colt's foot juice
50 g Washing Soda (used this first before vitamin C)
10 g Vitamin C
12 minutes at 25°C
Colt's Foot Test
Method
| Step | Time | Temperature |
|---|---|---|
| Pre-wash | 1 min. | 20°C |
| Weed-ol | 12 min. | 25°C |
| Water/Stop | 3 min. | 20°C |
| Fixer | 6 min. | 19°C |
| Water/Stop | 10 min. | 20°C |
The film:
Very nice contrast, clear on perforations.
Will use F-Stop 11 1/2
Lessons:
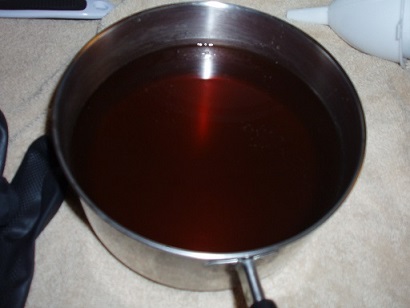
Left the lid off a little too long when boiling. This may have resulted in a slightly more concentrated mixture, A beautiful copper colour though.
--- July 12, 2016 ---
Spent practically all day with the optical printer. The first 25 feet of my super 8 Dandelion Role One is almost shredded – the perfs are wearing thin, but held out for yet another transfer session. Had to connect the Super 8 mechanics on the Optical Printer but was able to do it with a little less frustration this time. Lisa another filmmaker was working with the Optical Printer this weekend, I have dubbed her the OP Fairy because she cleaned and lubed up the Optical Printer, it looks like a brand new machine. Thank you OP Fairy! I need to learn how to do this, maybe the OP Fairy will teach me one day.
Later that evening...
Tonight I developed Super 8mm Dandelion Role Two in the Lomo with Caffenol. The Caffenol continues to mess up my fixer, I either need to drain the Lomo Tank much better or add an extra wash after the developer. I think I can get one more use out of this fixer before I start a new batch. Loading the Super 8mm into the Lomo was easy.
Loading 16mm was a bit harder. I spent over an hour, in the dark, trying to load the 100 feet of 16mm into the tank (50 on the top reel, 50 on the bottom reel). I didn't process tonight just loaded the tank.
Tomorrow I will need to double the dandelion recipe because I will be processing 100ft of 16mm film.
--- Double Dandelions ---
Boiled down lots of dandelions.
I decided to triple the recipe and then boil down to get the 2 litres. Technically I only need 1.8 litres to process to process two 50 ft. rolls of 16mm but it is easier to mix 2 L and then just pour the 1.8 litres into the tank.
Method for Double Dandelion Juice:
3 X 79 g = 237g Dandelion Weight
3 X 1.5 litres of Water = 4.5L
Boil for 2 hours and let cool and reduce to 2L
Dandelion Recipe for 2 litres for two 16mm 50ft roles in the Lomo Tank:
200g Washing Soda
40g of Vitamin C
14 min at 25°C
only use 1.8 litres of the mixture (or tank will overflow)
Method
| Step | Time | Temperature |
|---|---|---|
| Pre-wash | 1 min. | 20°C |
| Weed-ol | 12 min. | 25°C |
| Water/Stop | 3 min. | 20°C |
| Fixer | 6 min. | 19°C |
| Water/Stop | 10 min. | 20°C |
The film:
I burnt it grrrr... Not bad but still is was brunt and dark. When projected it was not that bad though this ORWO stock is very grainy, it is an interesting look but I am not sure I like it for this project.
Lessons:
This may sound weird but I felt the film speak to me, but I didn’t listen to it. The film said at 12 minutes, “I think it is time to stop developing now.” But I did not listen and trusted the science instead, "AH the bane of the timer!" I also noticed when I poured out the developer it did not have the Carmel Colour that I got with previous Lomo developing.
I thought it would take extra time fill and drain the tank because of the additional liquid, so I alowed for a couple of extra minutes. The film also got unwound in the tank and covered up the drainage tube making it difficult to drain the tank after the developer.
The top spool was in better condition than the bottom, "better" in this case means not as burnt. Is the bottom part of the developer stronger than the top? Does it chemically settle despite the agitation?
Alex seems to think my fixer is almost spent as well.
I think in the future I will only do one 50ft 16mm role at a time and maybe see if I can re-use the developer the same evening.
--- July 21, 2016 ---
A very good day with the optical printer! I was able to connect the Super 8mm plate effortlessly. A little trouble maintaining focus, I need my glasses now all the time.
Transferred second Super 8mm Dandelion Roll to 16mm
Used the same developer.
The second 16mm was much better than the first.
Not so hot either!
Started at mixing first developer batch at 23°C which increased to 26°C.
Started at second batch at 21°C and achieve perfect temperature of 25°C.
Footage is very good, very, very grainy - not sure about this ORWO stock.
My footage of the dandelion heads is nice but shaky! I am shooting goldenrod this week, I will use a tripod.
Had screening at Afcoop with the test batch that was dark, it looked very dark on the screen, but people were excited and interested in the workshop that I hope to teach this September.
--- July 25, 2016 ---
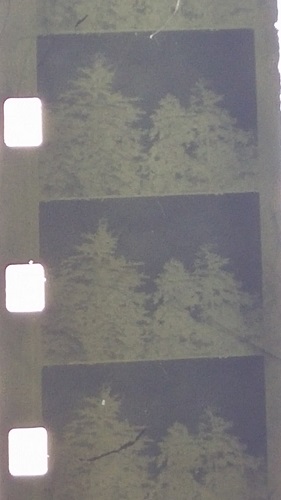
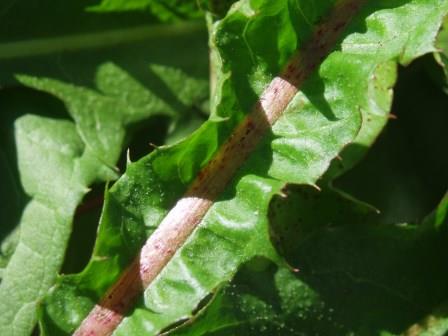
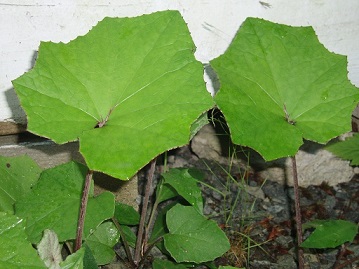
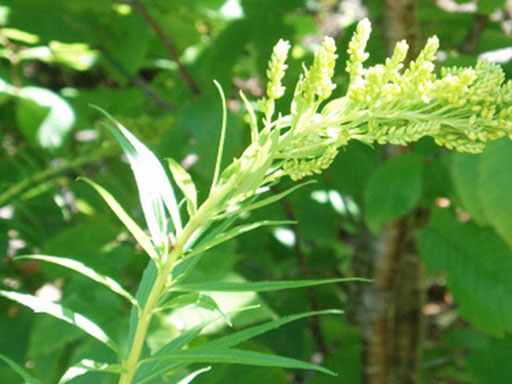
Filmed Colt’s Foot and Goldenrod this morning and found this unrelated piece of green happiness.

Transferred Colt’s Foot and came to the realization that one roll of super 8 at 50 feet = one roll of 16mm at 100 feet on the optical printer. This means 6 rolls of super 8 will be 12 roll of 16mm film. This is a significant cost and was not in the budget. I transfered Roll 1 of the Colt’s Foot anyways.
Exhausting night. Processed 100 feet of Colt’s foot with crappy results because I used the wrong F-stop. I based my bracket test on the too hot developer and therefore when I exposed everything at 11.5 with correct processing everything was over exposed. A waste. But lesson’s learned so maybe not a waste. I am exhausted and bummed out. Need to rethink how I am going to transfer the Super 8. Perhaps I will just transfer the footage that I really, really like.
Taking a week off to regroup and reassess the project. Ch-ch-changes....
--- August 8, 2016 ---
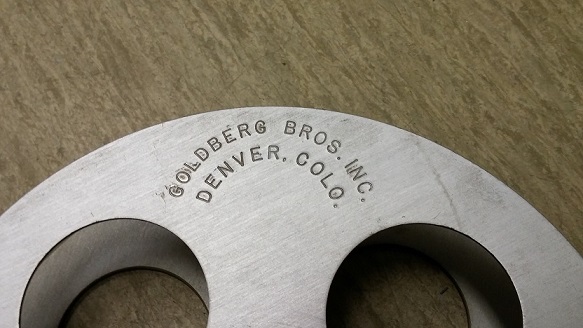
Just when I had a plan… Alex suggested maybe I use "poofier" stock like tri-x to see if retains more of the colour. This stock is more expensive!!! The ORWO is a hardy stock and super grainy, which I can attest to - every time I tried to use the internal film cutter in the Bolex to cut the ORWO stock it was really tough (in the end I just ended up using scissors). We also talked about tiniting and toning film to show more of the plant off. He also sent me a link to Process Reversal. The filmmakers in this Colorado based collective are getting some interesting results with tinting and toning, maybe I can too with the weeds.
Decided to do try three bracket tests with Tri-x on the optical printer and process in each respective weed to see if there is a difference.
--- August 10, 2016 ---
I cannot make heads or tails of my bracket tests, so I am redoing the bracket tests today. I am beginning my bracket tests with a pattern that looks like this:
X_ _X _ _ _ THEN THE BRACKET TEST
(where X = a frame with an image on it) You can use any frame but what matters is the pattern.
Hopefully this will help to know where the start of the bracket tests begins.
I knew this already, sometimes I have to learn the hard way.
Last night I developed Golden Rod Roll 2 of 2 in the lomo with Caffenol. What I discovered is that I don't need to use a hammer to open the super 8 cartridges you can simply pull the film out. There is a point when you need to give it a little tug but it comes out quiet easily. It sure beats slamming a hammer in the the darkness. The roll turned out great. I love caffenol, it is consistent.
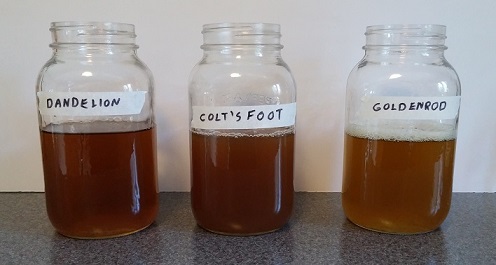
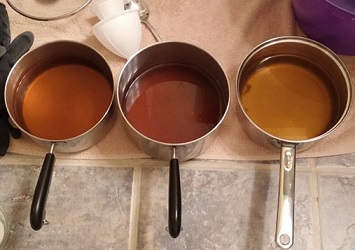
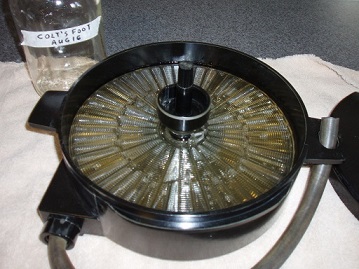
I have started "preserving" some of the weed-ol in mason jars, just in case the weeds start to die off in the colder weather. They are all sort of a “tea" colour but have subtle differences in colour.
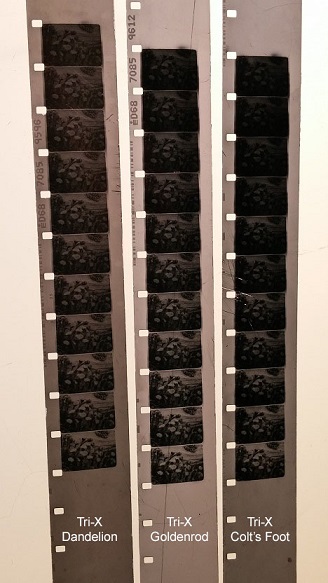
Below are the tri-X bracket tests, each developed in their own weed-ol. There are slight differences, but I think the true essence of the plant will come out when I tint the film with the weeds.
I am starting to tint test film. I am using some of the jumpy film from when the optical printer wasn't functioning properly.
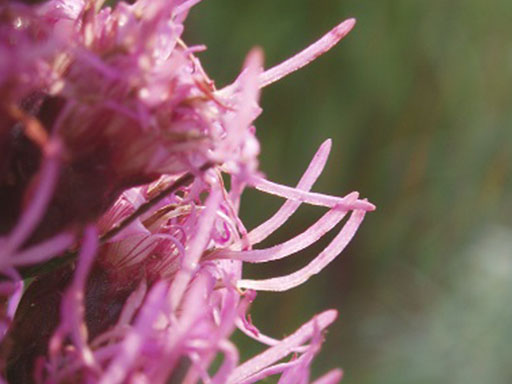
I began two tint tests - Goldenrod and a plant called a Blazing Star (just for fun). One cool fact about the Blazing Star is that it flowers from the top of the plant down. It is also a beautiful purple plant! I thought the Blazing Star would produce a purple tint but it produces as lovely jello green tint!
Goldenrod
Blazing Star
--- August 11, 2016 ---
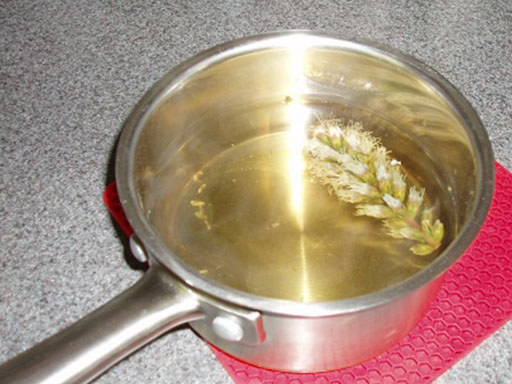
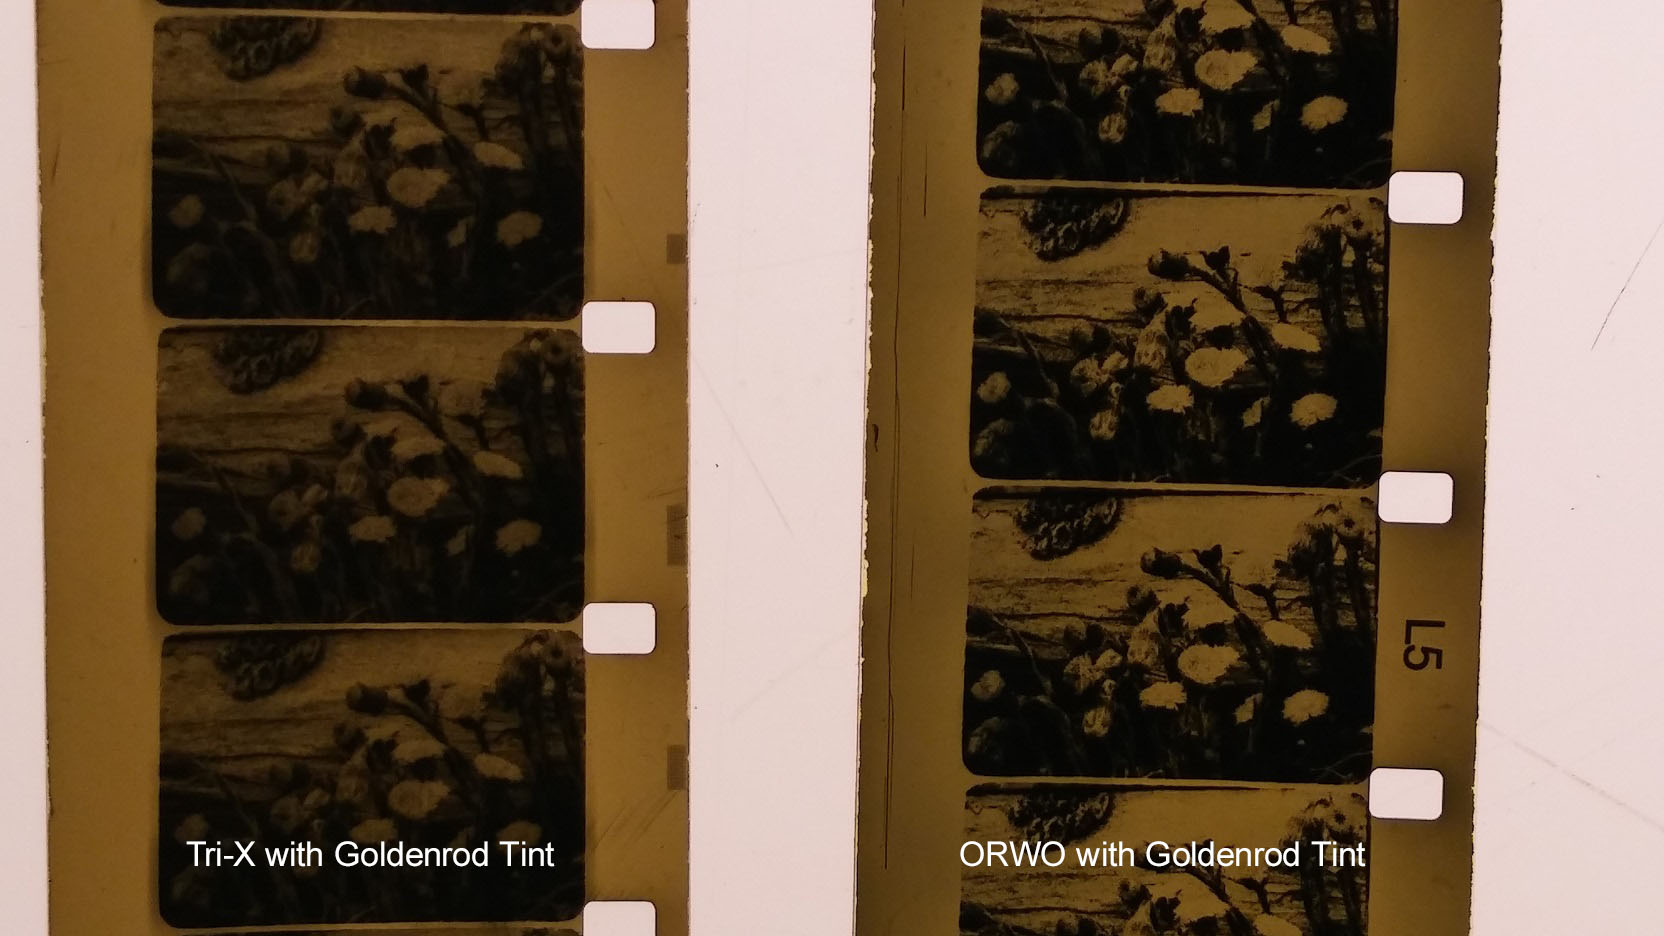
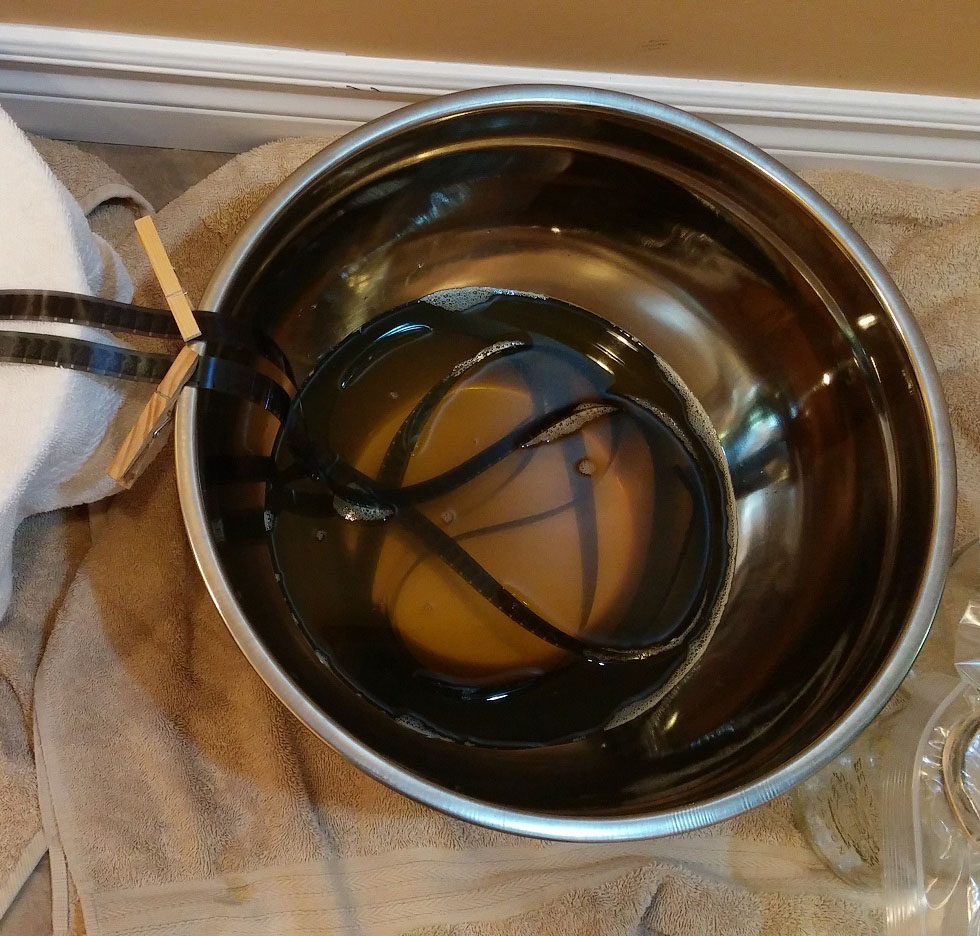 Showed Alex and Herb my tests. They suggested I print 5 seconds of my favourite shot on tri-x and then the ORWO stock and then tint them and see which one I like the best. Again, good advice. I bucket processed both rolls and then tinted both stocks in goldenrod "tea". I am letting the film sit in the "tea" in a stainless steel bowl. The clothes pins hold the film in place and prevent all of the film from sliding into the tint. This method is not the best, because the film can touch itself and that means that the tint may not be even. It would be better if I had another lomo tank to tint in. Right now I am using Afcoop's lomo tank to process the film and tinting film could take a long time, during this time I wouldn't be able to use the lomo tank to develop. I also don't know if the tint will stain the plastic spiral in the lomo tank. It looks like I may have to invest in a lomo tank.
These tints took 8 hours, I kept checking in every two hours to make sure the emulsion didn't slip off. Though both are quiet nice I like the softness of the tri-x with the tint, the ORWO is kind of gritty. Finally I "get" film stocks. Each stock has it's own characteristic, they all pick up light differently, have different grain, a different feel. Looking forward to exploring other kinds of film stocks in the future.
--- August 12, 2016 ---
Today I brought the film into Afcoop to have a look at it on the Steenbeck, but it appears the film is jiggity/shaky/bumpy again. I have heard that the JK Optical Printer was fussy and now I know it to be true. Bad news, I have to wait to transfer more footage (until the Optical Printer can be fixed). Good news, have decided to go with the tri-x for this project.
--- August 16, 2016 ---
Everything is "in bloom" right now. I am putting 9 mason jars of the "tea" away (three of each weed) just in case the weeds disappear. Also prepping for my first class later this week
--- August 24, 2016 ---
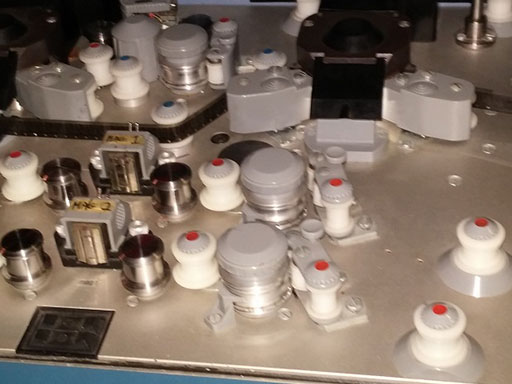
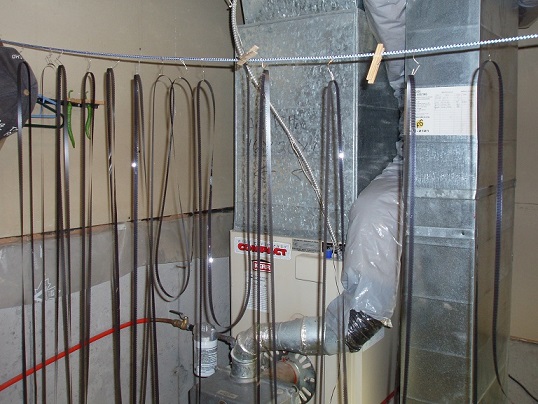
Alex has spoken with infamous "JK" and made the necessary adjustments. I learned a little bit more about making adjustments on the Optical Printer (very tiny intricate adjustments). I tested to see if the "shake" was gone and I happy to report the problem is resolved. Today I transfered all six rolls of super 8 down to three rolls of 16mm tri-x. This meant I had to pick and choose my shots, which was easier than I thought. Took a lot of detailed notes and took a couple of pictures of my surroundings.

--- September 12, 2016 ---
This week I processed all the rolls I shot on the 24th. All of the dandelion footage and one of the goldenrod reels did not develop well. I was using the same recipe for the dandelions that I did in the past. Is it possible that the older dandelions don't make for a potent developer as earlier in the season? Ah Weedol, so fussy. Back to more bracket tests with the dandelions. I am feeling overwhelmed as the film festival is on and I have some heavy commitments coming up in October. Breath, all things will get done in good time.
--- September 21, 2016 ---
I am so glad I annotated all of the dandelion footage when I transfered it to the optical printer the first time, it makes it so much easier to know what need to be re-transfered the second time.
--- September 22, 2016 ---
Running out of goldenrod flowers, took a field trip and a nice hike to find some; no trouble finding dandelions though!
--- September 26, 2016 ---
Very pleased with the dandelion and colt's foot developed film. I've been trying to make my own device for tinting film because I don't want to stain/break Afcoop's lomo tank. It is time to invest in a tank.

--- November 16, 2016 ---
The lomo tank arrived from the Ukraine today. It took a bit of time to find one and then get it shipped and then to pay the duty but I am so pleased with the condition of it. Thank you person from Ukraine!! The colt's foot tea I preserved back in August smells like honey. Did I make mead? I tasted it (before I put the film in) it sort of tastes like honey. Dyed ORWO stock for four hours in new lomo tank just to test what was going to happen. Lovely, no staining of the tank, just of the film!!
--- November 21, 2016 ---
A weird thing happened today. Two people (who don't know each other from different provinces even) asked me if I knew Helen Hill. I did not. I know people that knew her and they all speak highly of what a beautiful soul she was. I have been privileged to hear first hand stories of her influence on filmmakers I know, about her zest for life; and the kindness and guidance she imparted to so many in the film community. But, I did not know her. I have watched her films, have her amazing book "Recipes for Disaster," and even heard a radio documentary about her. But I did not know her. Oddly or maybe not, throughout this whole process/project, I have been thinking about her and her work in one way or another - the whole hand processing in my lav/lab, hand tinting, learning about film in this manner, and being in Atlantic Canada. When her name comes up it is always a special, quiet gift from the universe that I am happy to acknowledge. "Thank you."
--- December 12, 2016 ---
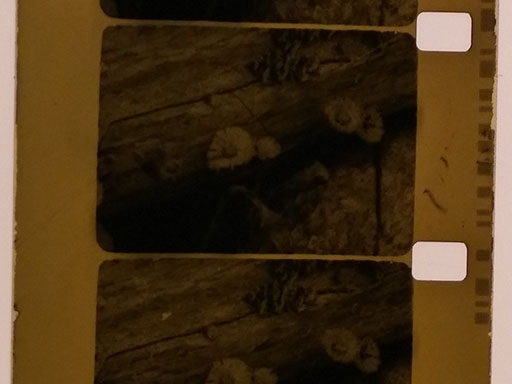
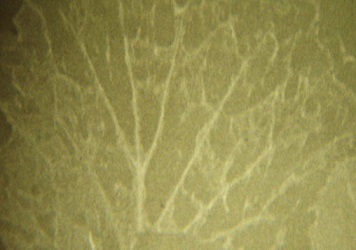
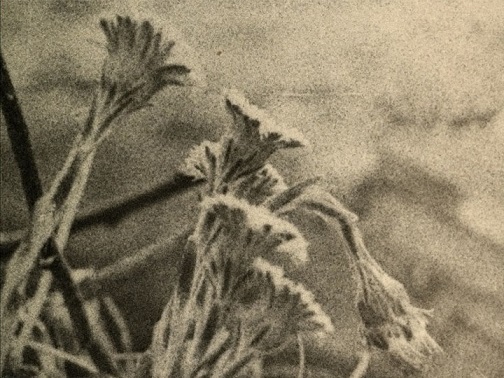
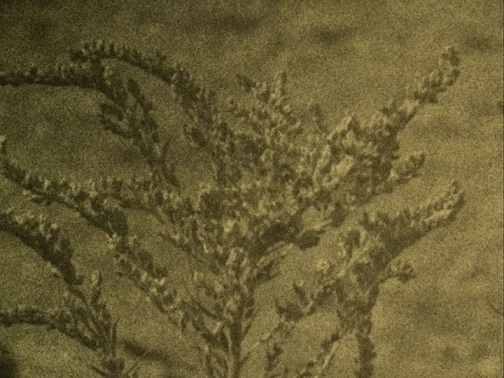
I have been in contact with one of the technicians at Frame Discreet they have been very excited and supportive about the project. They did their best to keep the transfer as true as possible to the original colour and I think they did a stellar job!! These are stills the stills they sent.

--- February 1, 2017 ---
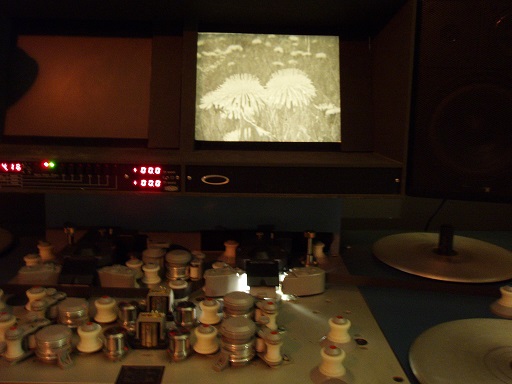
Happy new year! I've been going over the footage and have started editing. There have also been computer issues in there, which I have decided just happens once in a while - oh patch Tuesdays!! I love editing - digitally. I have edited on the Steenbeck before and it was fun, but there is a whole brand new bag a creativity you can unleash with a digital non-destructive work flow. I also want to intricately compare and contrast the plants, developers, and tints and the best way to do this was by dividing the screen. "The tri-screen" a throw back to the 70s at Ontario Place maybe? I'm using Adobe's AfterEffects and Premier for this. It has been pretty easy but requires some deep focus to get the timing I have in my head to match the screen, but I am getting there. I can "hear" the sound, but I just don't know where it is going to come from yet. I have decided that each plant will have its own vibrational tone (like we all do) the tone will coincide with the image. The tones should harbor the same characteristics but be different. Same but different.
--- March 8, 2017 ---
Found the sound!!! I was hanging out at a friends place and I heard it. It was like orchestra strings all playing one note together, I thought it was music at first, but the stereo was playing something else. I kept hearing it, this vibrational tone. I walked around the place (hands up and out) trying to feel it. The sound got louder, even changed a bit, but it was still a good sound. Finally, my friend emerged electric toothbrush in mouth! "That's the sound," I declared! Recording took place shortly after with a bit more editing and finessing.
--- May 20, 2017 ---
See Weeds is complete and will be premiering at HIFF!
Reflecting back on this project what I really learned about was failure and that there is no "failure." There are just results that didn't work out but all these "results that didn't work out" or "failures" really inform the next step in the process. This film is dark - try less agitation, that didn't work so alter the temperature, that didn't work - try this. Failure allows you to find and refine and get to where you need to be. Failure is not a negative but positive.
Thank you for reading.